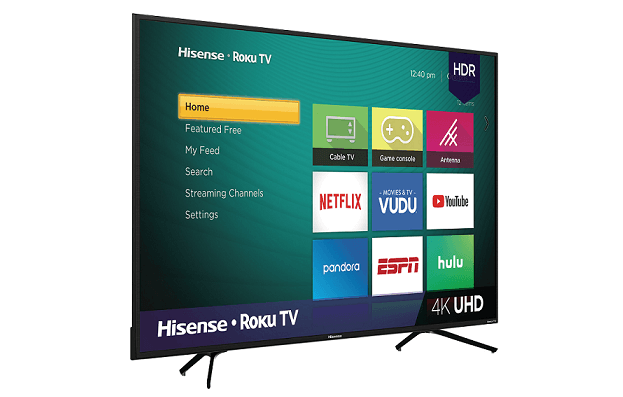
If you have just purchased a Hisense TV, you may need some time to set it up in the best possible way. Setting up your TV correctly gives you a bright and clear picture that is a pleasure to watch on the screen.
In this article, we will provide a complete guide on how to set up your Hisense TV, which includes both the initial settings and expert level settings. You will also learn how to get the best picture quality by utilizing the various features and options of the TV.
Whether you are a beginner or an expert technician, this guide will help you set up your Hisense TV for the best possible performance and enhance the experience of watching your favorite movies and shows.
How to set up your Hisense TV

1. Optimizing Brightness and Contrast Settings
You should start setting up your Hisense TV by optimizing the brightness and contrast settings. To do this, turn on the TV and go to the picture settings menu. Adjust the brightness and contrast so that the picture on the screen is bright and contrasty.
2. Adjusting the color gamut
The colors on your Hisense TV may not be optimally adjusted. To correct this, go to the picture settings menu and adjust the color gamut. Try different settings to choose the best one for your TV.
3. Adjusting the sound settings
To customize the sound on your Hisense TV, go to the sound settings menu. There you will be able to adjust the volume, equalizer and other sound settings. Adjust the sound so that it sounds clear and loud.
4. Connecting external devices
To get the best picture quality on your Hisense TV, you can connect external devices such as game consoles, DVD players or computers. Connect the device to the TV with an HDMI cable and adjust the picture on the device. Also check that the HDMI input on the TV is correctly set to input from the device.
Basic settings
Language and Region
Before you start setting up your Hisense TV, you should set the language and region. This will ensure that all functions work correctly and avoid errors. From the “Basic Settings” menu, select “Language and Region” and set the desired values.
Network settings
If you want to use Internet services on your TV, you need to set up an Internet connection. In the Network Settings menu, select the type of connection (Wi-Fi or Ethernet), enter the required data and save the settings.
Picture
For the best picture quality, it is recommended that you set the optimal TV settings in the Picture menu. Select Cinema mode and adjust brightness, contrast, saturation and other settings. This will give you the sharpest and most colorful picture possible.
To achieve the best picture quality on your Hisense TV, you need to choose the most appropriate screen mode. Depending on your preferences and viewing conditions, you can choose one of the following modes:
| Mode | Description |
|---|---|
| Dynamic | This mode is suitable for sports broadcasts and fast motion on the screen. It provides bright and saturated colors, but may cause image distortion. |
| Standard | A mode recommended for everyday TV viewing. It provides the most natural and balanced picture without bright colors or distortion. |
| Movie | This mode is suitable for watching movies. It provides a warmer color scheme and creates a cinema atmosphere. |
| Sports | A mode customized specifically for watching sporting events. It improves motion display and makes the picture clearer. |
| Game | This mode optimizes the picture for gaming. It improves clarity, contrast, and the screen’s response to user actions. |
Best picture settings for Hisense 4K TV
When choosing the best picture settings for your Hisense 4K TV, it is important to understand the different preset modes such as Cinema, Sports, Game and Vivid. Each of these modes has its own advantages and disadvantages suitable for different usage scenarios. For example, Cinema mode provides a cinematic experience when watching movies in a dimly lit room, while Sports mode creates a more dynamic image for watching sports in well-lit rooms. When adjusting the modes, it is important to experiment to find the best fit for the visual experience on your TV screen.
Picture Mode: Movie
- Backlight: 50-60
- Contrast: 85-90
- Brightness: 50-55
- Sharpness: 0
- Color: 50-55
- Hue: 0
Additional settings
- Dynamic Contrast: Off.
- Color Temperature: Warm
- Gamma: 2.2
- HDMI UHD Color: On (for HDMI inputs)
- Motion smoothing: Off
- Image Size: Native or Aspect Ratio (depending on your preference)
- HDR Mode: Auto (if available)
Sound
To get the best sound quality, it is recommended to set the optimal TV settings in the Sound menu. Select Movie mode and adjust the volume, tone and other settings. This will give you the clearest and deepest sound possible.
Picture settings

Brightness and contrast
To set the brightness and contrast of your Hisense TV, go to the “Picture” menu. After that, select “Brightness” or “Contrast” and move the slider to the right or left depending on your preference.
Adjusting color and saturation
If you want to adjust the color and saturation on your Hisense TV, go to the “Picture” menu. Select “Color” or “Saturation”, and move the slider to achieve the ideal color and saturation.
Picture Modes
Hisense provides several picture modes: “Dynamic”, “Natural”, “Cinema”, etc. Each is customized to meet specific requirements and playback situations. Switch modes until you find the one that suits you best.
Motion Resolution and Processing
Hisense TVs are also equipped with motion processing to improve motion quality and prevent screen blurring during dynamic scenes. From the picture drop-down menu, you can select “Resolution” or “Motion Processing” and change these settings to suit your needs.
Additional features
Hisense TV has several additional features such as “Audio Masking” function, “Picture Temporizer” and many more. They can help you customize your TV for specific usage scenarios and ensure the best picture quality.
Audio settings
Volume control
To change the volume level on your Hisense TV, you can use the buttons on the remote control or the built-in buttons on the TV. However, to get the best sound quality, it is recommended to use external speakers or a sound bar.
Adjusting the balance and equalizer
If you need to customize the sound on your Hisense TV to your preferences, you can use the equalizer function. In the sound menu, you can adjust the treble, midrange and bass frequencies to achieve the optimal sound.
You can also adjust the sound balance to emphasize certain sounds, such as actors’ voices or scene sounds. This feature is useful for those who have hearing problems.
Using an external audio system
To get better sound quality on your Hisense TV, you can connect an external audio system such as speakers or sound bar. In this case, you can get a full sound range and enjoy high quality sound.
- Connect the external audio system via an optical cable or HDMI cable.
- Select the operation mode of the external audio system in the sound menu.
- Set the sound parameters according to your preferences.
Connecting to the Internet
Wi-Fi connection
To connect to the Internet via Wi-Fi on your Hisense TV, you need to:
- Open the setup menu
- Select “Network” section
- Select “Wi-Fi wireless connection”
- Select the available Wi-Fi network and enter the password if required
After successful connection, a notification will appear and the Wi-Fi icon will be displayed at the top of the screen.
Connecting with an Ethernet cable
If you do not need a wireless connection, you can use an Ethernet cable to connect to the Internet. To do this:
- Connect an Ethernet cable to your TV and modem or router
- Open the settings menu and select the “Network” section
- Select “Wired connection”
When the Ethernet cable connection is successful, a notification will appear.
Smart TV Setup Features
1. Internet connection setup
Before you start setting up, make sure your TV is connected to the Internet. To do this, go to “Network” in the menu and select Wi-Fi or Ethernet connection. If you have chosen Wi-Fi, you will need to enter your network details and password.
- It is important to make sure that the Wi-Fi signal is strong enough for stable operation of Smart TV.
- If your connection is slow, the viewing quality will be poor.
2. Updating the system and applications
Periodically, you should check for new updates for the operating system and applications on your TV. Updates can improve stability, fix bugs, and add new features.
- To check for updates, go to the menu and select Software Update.
- If an update is available, follow the on-screen instructions to install it.
3. Installing applications
To get the most out of your Smart TV, it is recommended that you install the apps you need. Some TVs already have pre-installed apps such as Netflix and YouTube, but you can install others.
- Go to the app store and find the one you want.
- Select it and click “Install.”
- Once installed, the app will appear on the Smart TV home screen.
Make sure you install apps from trusted sources to protect your device from malware.
Troubleshooting setup problems
Problem: No image
If you don’t see a picture when you turn on your Hisense TV, the problem may be with the HDMI cable. Make sure the cable is properly connected and working properly. Also check that you have selected the correct input source on the remote control.
Problem: Poor picture quality
If you have a problem with picture quality, first make sure your TV is set to the correct resolution. If all the settings are correct, try adjusting the brightness, contrast and color saturation in the settings menu.
If this doesn’t help, then check that the HDMI cable is being used with high refresh rate and resolution support. Sometimes poor picture quality can be due to a firmware update on your TV. Make sure you have the latest firmware version installed.
Problem: TV turns off suddenly
If your Hisense TV turns off suddenly, the problem may be due to overheating. Make sure that the TV is in a well-ventilated place and nothing is blocking the ventilation. Also make sure that the remote control is working properly and the batteries are not dead.
If the problem persists, then contact a Hisense service center for diagnosis and repair.
How do I get the best picture quality on my Hisense TV?

1. Calibrating your TV
Before setting up your Hisense TV, be sure to calibrate it. Use special test pictures or an app to calibrate your TV. Adjust the brightness, contrast, saturation and fine-tuning to your viewing conditions. This way, you’ll get the best picture quality that won’t tire your eyes or change the color gamut.
2. Adjusting color and contrast
To maximize the clarity and saturation of the picture, set the contrast on your Hisense TV to maximum and the brightness to medium. It is also recommended to set the color to natural or standard mode. If, however, you want to adjust and customize each setting in the best possible way, use the manual color and contrast settings through the menu settings.
3. To use Picture mode settings
In addition to the basic contrast, brightness and color settings, Hisense TV also has Picture mode, which allows you to automatically optimize picture settings based on the category of material. Owners of Hisense 4K TV models can use HDR mode to watch 4K movies with the best picture quality.
4. Picture sharpness
For a more accurate and realistic picture, set the sharpness to 10-15 depending on what you like or are more accustomed to. Most Hisense TVs also have a sharpening function that can slightly improve the picture quality. However, you should be careful when using this feature. In some cases, it can make the picture look unnatural and even damage the picture quality.
5. Proper lighting
Use the right lighting in the room while watching. Strong lighting can degrade the quality of the picture on your TV, so it is preferable when the room is dark or semi-dark. If you are watching TV in normal light, however, reduce the brightness of the screen to balance the lighting in the room and maximize the picture quality.
Q&A
How do I connect my Hisense TV to Wi-Fi?
To connect to a Wi-Fi network on your Hisense TV, you need to go to the network settings, select Wi-Fi and enter the network password. If the network is hidden, you need to manually enter the network name and its password.
How do I adjust the picture quality on my Hisense TV?
To adjust the picture quality on your Hisense TV, you need to go to picture settings and select the mode that best suits the type of content you are watching. Set the brightness, contrast and saturation to achieve the desired picture quality.
What should I do if the sound on my Hisense TV does not work?
If the sound on your Hisense TV doesn’t work, check the audio cable connection and volume level. If the problem persists, try restarting the TV or contact the manufacturer for further assistance.
Which remote control is suitable for my Hisense TV?
Original remote controls are suitable for the Hisense TV, which can be purchased from the manufacturer or from home appliance stores. You can also use universal remote controls, which are suitable for most TVs, and customize them for your Hisense TV.
How do I set the mirror screen on my Hisense TV?
To set up the mirror screen on a Hisense TV, you need to connect a device, such as a smartphone or tablet, to the TV via Wi-Fi and select the mirror screen function on the device.
How do I install apps on my Hisense TV?
To install apps on your Hisense TV, you need to go to the app store on your TV, select the app you need and install it. If the app is not available in the app store, you can install it via USB drive or download it from the website.
How do I set up my Hisense TV for antenna viewing?
To set up your Hisense TV for Antenna viewing, you need to go to TV reception settings and select Antenna reception mode. You also need to adjust the frequency and channels to get the best signal quality.


